Roasted Lemon Garlic Chickpea Skillet
Highlighted under: Wellness Meals Co.
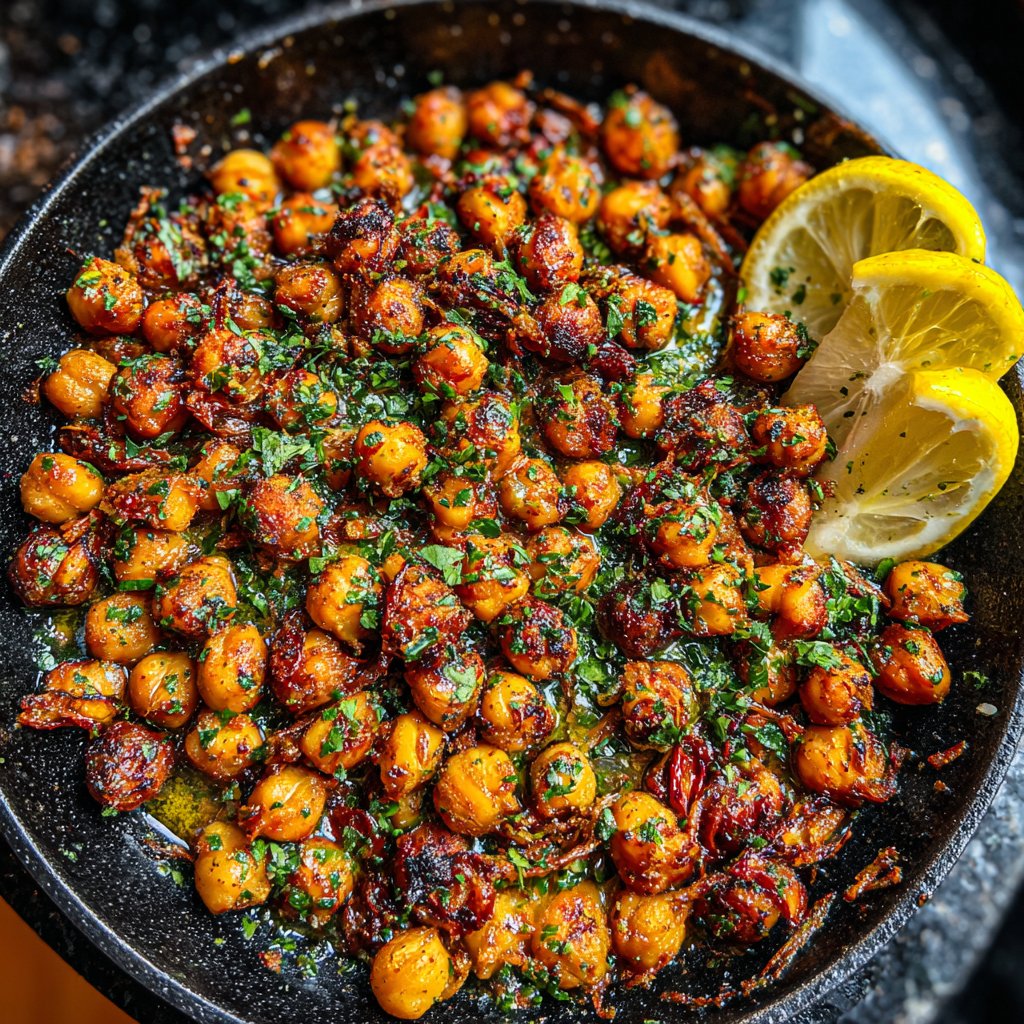
I absolutely love this Roasted Lemon Garlic Chickpea Skillet! It's a vibrant and flavorful dish that perfectly combines the nutty taste of chickpeas with the zesty brightness of lemon and the aromatic quality of garlic. Every time I make this dish, I’m reminded of the simplicity and joy that comes from fresh ingredients. Plus, it's incredibly quick to prepare, making it a perfect weeknight dinner option. Trust me, once you try it, you'll find yourself reaching for this recipe time and again!
Every time I whip up my Roasted Lemon Garlic Chickpea Skillet, I find it hard to believe how such simple ingredients can create such a delicious meal. The chickpeas get a beautiful roast that enhances their flavor, while the garlic adds a depth that just sings in your mouth. I usually serve it with a side of quinoa or over leafy greens for extra texture.
This dish is versatile; you can easily add your favorite vegetables or swap in herbs according to your taste. I recommend using fresh lemon juice for the best flavor, as it brightens the entire dish like nothing else!
Why You Will Love This Recipe
- Nutty chickpeas roasted to perfection
- Zesty lemon flavor brings brightness
- Quick, easy, and packed with nutrients
Perfecting the Roasting Technique
Roasting chickpeas is all about achieving that delightful crispy texture while preventing them from becoming dry. The key is to use enough olive oil to coat them well, as this helps in getting that perfect golden-brown exterior. Toss your chickpeas mid-way through roasting to ensure even crisping. Keep an eye on them in the last few minutes; they can quickly go from perfectly roasted to overdone.
If you're unfamiliar with how crispy they should be, look for a slight crunch when you taste one. The outer layer should be hard, while the inside remains tender and nutty. To avoid sogginess, make sure to drain and rinse canned chickpeas thoroughly to remove excess starch. Pat them dry before roasting for the best results.
Flavor Enhancements and Variations
While this dish highlights lemon and garlic beautifully, it's also a canvas for your creativity. For a spicy kick, consider adding a pinch of cayenne pepper or chili flakes alongside the smoked paprika. Adjust the lemon zest and juice balance according to your personal preference; some may prefer a more pronounced citrus note. Alternatively, adding a splash of balsamic vinegar after roasting can bring a delightful depth to the flavor profile.
If you're looking to customize this dish further, try experimenting with herbs. Fresh thyme or rosemary can complement the garlic beautifully and add an aromatic layer. You can also explore different oils, like avocado oil, for a unique taste while keeping the same roasting technique.
Storage Tips and Make-Ahead Options
This Roasted Lemon Garlic Chickpea Skillet is incredibly versatile for meal prep! If you want to prepare it ahead of time, roast the chickpeas and store them separately. They can sit in an airtight container for up to four days in the refrigerator. Just reheat them in the oven for a few minutes to restore their crispness before serving. If you store them in a sealed jar, they can also stay crispier longer than if kept in plastic containers.
For longer storage, you can freeze the roasted chickpeas. Spread them out on a baking sheet to freeze individually before transferring them to a freezer bag. This allows you to pull out small portions as needed. When you're ready to enjoy them, simply re-roast them from frozen at 400°F until they reach that desired crispness again, about 10–15 minutes.
Ingredients
Gather the following ingredients:
Ingredients
- 2 cans chickpeas, drained and rinsed
- 4 tablespoons olive oil
- 4 cloves garlic, minced
- 1 lemon, zested and juiced
- 1 teaspoon smoked paprika
- Salt and pepper to taste
- Fresh parsley for garnish
Make sure to preheat your oven for even cooking!

Instructions
Follow these steps to create your dish:
Roasting the Chickpeas
Preheat your oven to 400°F (200°C). Spread the chickpeas on a baking sheet and drizzle with olive oil. Add minced garlic, smoked paprika, salt, and pepper, tossing until well-coasted. Bake for 20 minutes or until crispy, stirring halfway through.
Finishing Touches
Once your chickpeas are roasted, remove them from the oven and stir in lemon zest and juice. Adjust seasoning if necessary. Let them rest for a few minutes.
Serving
Serve warm, garnished with fresh parsley. This dish pairs perfectly with grains or can be enjoyed solo!
Enjoy your flavorful Roasted Lemon Garlic Chickpea Skillet!
Pro Tips
- For a bit of heat, consider adding a pinch of red pepper flakes before roasting the chickpeas. You can also customize this dish by adding seasonal vegetables like bell peppers or zucchini for extra nutrition.
Serving Suggestions
This Roasted Lemon Garlic Chickpea Skillet can be served as a main dish or a hearty side. Pairing it with cooked quinoa or brown rice enhances the meal's nutrition and adds a chewy texture that contrasts beautifully with the crispy chickpeas. You can also top a fresh green salad with them for an added protein boost.
For a refreshing twist, a dollop of yogurt or a sprinkle of feta cheese can elevate the flavors even further, contrasting with the zesty chickpeas. Additionally, these roasted chickpeas make a great snack on their own, served with a side of hummus or a light dip, making them a delightful option for entertaining.
Troubleshooting Common Issues
If your chickpeas aren't getting crispy enough, it may be due to excess moisture. Make sure they are patted dry thoroughly before adding oil and seasonings. Any water left on the chickpeas can lead to steaming rather than roasting, which affects the texture. You can also try roasting them a bit longer, keeping a close watch to prevent burning.
If you find that your chickpeas are overcooked and start to turn too dark, the next time, consider reducing the roasting time by a few minutes. Every oven varies, so it’s beneficial to get to know how yours operates. Using an oven thermometer can help confirm the accuracy of your oven temperature, leading to more reliable crispy results.
Questions About Recipes
→ Can I use dried chickpeas instead of canned?
Yes, just soak and cook them until tender before using them in this recipe.
→ Is this recipe vegan?
Absolutely! It's entirely plant-based and packed with flavor.
→ Can I store leftovers?
Yes, store in an airtight container in the refrigerator for up to 3 days. Reheat before serving.
→ What can I serve this dish with?
It pairs well with quinoa, rice, or a crisp green salad.
Roasted Lemon Garlic Chickpea Skillet
Created by: Veronica Miles
Recipe Type: Wellness Meals Co.
Skill Level: Easy
Final Quantity: 4 servings
What You'll Need
Ingredients
- 2 cans chickpeas, drained and rinsed
- 4 tablespoons olive oil
- 4 cloves garlic, minced
- 1 lemon, zested and juiced
- 1 teaspoon smoked paprika
- Salt and pepper to taste
- Fresh parsley for garnish
How-To Steps
Preheat your oven to 400°F (200°C). Spread the chickpeas on a baking sheet and drizzle with olive oil. Add minced garlic, smoked paprika, salt, and pepper, tossing until well-coasted. Bake for 20 minutes or until crispy, stirring halfway through.
Once your chickpeas are roasted, remove them from the oven and stir in lemon zest and juice. Adjust seasoning if necessary. Let them rest for a few minutes.
Serve warm, garnished with fresh parsley. This dish pairs perfectly with grains or can be enjoyed solo!
Extra Tips
- For a bit of heat, consider adding a pinch of red pepper flakes before roasting the chickpeas. You can also customize this dish by adding seasonal vegetables like bell peppers or zucchini for extra nutrition.
Nutritional Breakdown (Per Serving)
- Calories: 350 kcal
- Total Fat: 18g
- Saturated Fat: 2g
- Cholesterol: 0mg
- Sodium: 400mg
- Total Carbohydrates: 40g
- Dietary Fiber: 10g
- Sugars: 4g
- Protein: 12g