Mini Red Velvet Layer Cakes
Highlighted under: Home Baked Bliss
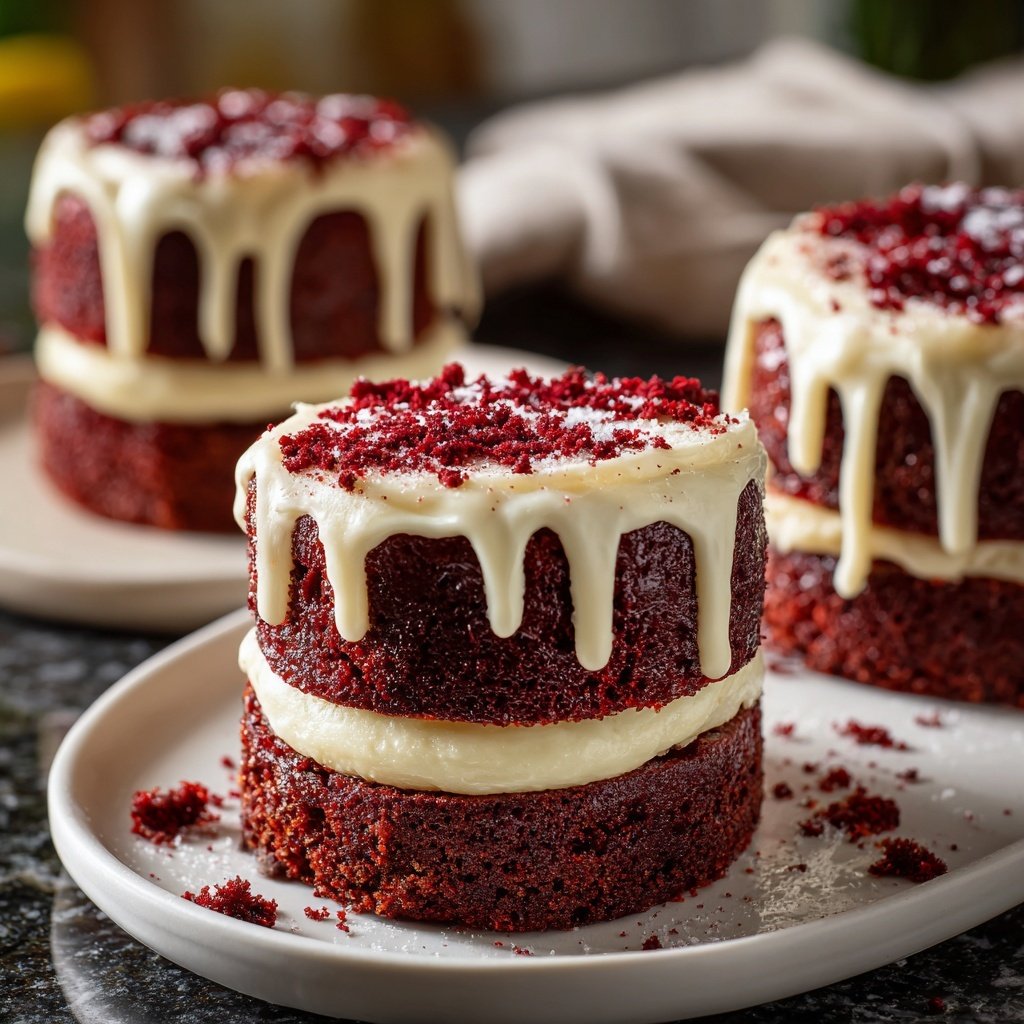
I love making these Mini Red Velvet Layer Cakes because they pack all the charm of a traditional red velvet cake into delightful little portions. Each layer is rich, moist, and dressed in creamy cream cheese frosting, creating a mini treat that's perfect for any occasion. Making these cakes allows us to savor the vibrant color and unique flavor profile of red velvet without overwhelming ourselves with a large cake. Plus, they look adorable on any dessert table, sure to impress all who see them!
When I first baked Mini Red Velvet Layer Cakes, I was in search of a dessert that would serve both as a treat and a conversation starter. The bright red color and smooth cream cheese frosting never fail to attract attention. I learned that the key to achieving the perfect texture is to properly measure the ingredients, especially the buttermilk, which gives the cake its signature moisture.
After several trials, I discovered that letting these mini cakes cool completely before frosting makes a huge difference in presentation. The moisture in the cakes blends perfectly with the frosting, creating a rich, harmonious balance that everyone seems to adore. I can't wait for you to try this recipe!
Why You'll Love These Mini Red Velvet Layer Cakes
- Adorable portion sizes perfect for sharing.
- Stunning red color adds a festive touch.
- Decadently soft and moist with cream cheese frosting.
Perfecting Miniature Cakes
When making these Mini Red Velvet Layer Cakes, it's crucial to ensure that the batter is mixed just enough to combine the ingredients without overworking them. Overmixing can lead to a denser cake texture, which contradicts the light and airy result we're aiming for. Use a spatula to gently fold the dry ingredients into the wet, stopping as soon as you see no dry flour. This method helps maintain the delicate crumb that makes these cakes so delightful.
Additionally, the choice of food coloring plays a key role in achieving the vibrant red hue characteristic of red velvet. I recommend a high-quality gel food coloring, which provides a richer color without altering the cake's moisture. If you find yourself without food coloring, you can substitute with beet juice for a more natural option, though this may slightly change the flavor.
Frosting Technique Matters
The cream cheese frosting is just as important as the cakes themselves. To achieve a smooth and creamy frosting, ensure both the cream cheese and butter are at room temperature before beating them together. This allows for easier incorporation and helps to avoid lumps. I usually let them sit out for about 30 minutes before starting the frosting preparation.
If you prefer a less sweet frosting, you can adjust the powdered sugar based on your taste preference. Just remember that reducing sugar may lead to a thinner consistency, so I recommend adding milk gradually to balance it out. Make sure to test the frosting thickness before frosting the cakes to ensure it holds its shape well between layers.
Storage and Serving Suggestions
After your Mini Red Velvet Layer Cakes are assembled, they can be stored in an airtight container in the refrigerator for up to three days. This also allows the flavors to meld beautifully as the cakes rest. If you want to get a head start on dessert prep, you can bake the cakes a day in advance, allowing them to cool completely before refrigerating them wrapped in plastic wrap.
For an elegant touch when serving, consider garnishing the cakes with edible gold leaf or fresh berries. This not only enhances their visual appeal but also introduces an exciting contrast in flavor. Pair these mini cakes with a scoop of vanilla ice cream for an indulgent dessert experience that is sure to impress your guests!
Ingredients
Gather the following ingredients before you begin:
For the Mini Cakes
- 1 cup all-purpose flour
- 1/2 cup granulated sugar
- 1/4 cup unsweetened cocoa powder
- 1/2 teaspoon baking soda
- 1/4 teaspoon salt
- 1/2 cup vegetable oil
- 1/2 cup buttermilk, room temperature
- 1 large egg, room temperature
- 2 tablespoons red food coloring
- 1 teaspoon vanilla extract
- 1 teaspoon white vinegar
For the Cream Cheese Frosting
- 8 ounces cream cheese, softened
- 1/2 cup unsalted butter, softened
- 2 cups powdered sugar
- 1 teaspoon vanilla extract
- 1-2 tablespoons milk (optional for consistency)
Make sure to have all your ingredients ready for a seamless baking experience!
Instructions
Here's how to make these delightful mini cakes:
Preheat and Prepare
Preheat your oven to 350°F (175°C). Grease and flour a mini cake pan or line it with parchment paper.
Mix Dry Ingredients
In a bowl, whisk together flour, sugar, cocoa powder, baking soda, and salt until well combined.
Combine Wet Ingredients
In another bowl, mix together vegetable oil, buttermilk, egg, red food coloring, vanilla extract, and vinegar until smooth.
Combine Mixtures
Gradually add the dry ingredients to the wet ingredients, stirring gently until just combined.
Bake
Pour the batter into the prepared mini cake pan. Bake for 20-25 minutes, or until a toothpick inserted into the center comes out clean.
Cool Cakes
Allow the cakes to cool in the pan for 10 minutes, then transfer them to a wire rack to cool completely.
Make Frosting
While cakes cool, beat together cream cheese and butter until smooth. Gradually add powdered sugar and vanilla extract. If needed, add milk for desired consistency.
Assemble Cakes
Once cooled, slice the mini cakes in half horizontally. Frost the top of one layer, stack another on top, and repeat until all layers are stacked. Frost the top and sides of the stacked cake.
Serve
Decorate as desired and serve these irresistible mini cakes to your guests!
Enjoy your homemade Mini Red Velvet Layer Cakes!
Pro Tips
- Make sure to use fresh ingredients for the best flavor. Don't skip the vinegar, as it helps react with the baking soda to create a lighter cake texture.
Troubleshooting Common Issues
If your cakes come out of the oven and seem to have domed significantly on top, don’t worry—this is common in baking. You can level the tops with a sharp knife before frosting them. Be careful not to cut too much off, as you want your layers to have some height for stacking. If the cakes stick to the pan despite greasing, try using parchment paper on the bottom for an easier release next time.
Another issue could be dry cakes, often caused by overbaking. To prevent this, start checking for doneness at the lower end of the baking time list. The toothpick test is a reliable method; if it comes out clean or with a few moist crumbs, you’re set.
Dietary Variations
If you're looking for a gluten-free option, you can substitute the all-purpose flour with a 1:1 gluten-free baking blend. Make sure it contains xanthan gum to help bind the ingredients together, which is especially important for cake texture. Your baking time might vary slightly, so keep an eye on the cakes as they bake.
For a dairy-free version, swap the buttermilk with a plant-based milk combined with an acid, like apple cider vinegar or lemon juice, to mimic the tanginess. You can also use dairy-free cream cheese and butter for the frosting, ensuring everyone can enjoy these mini treats regardless of dietary restrictions.
Questions About Recipes
→ Can I use a different type of food coloring?
Yes, you can use gel food coloring for a more vibrant color, but make sure it's suitable for baking.
→ How should I store leftover cakes?
Store them in an airtight container in the refrigerator for up to 3 days.
→ Can I freeze these mini cakes?
Absolutely! Wrap them tightly in plastic wrap and freeze for up to one month.
→ What can I substitute for buttermilk?
You can make a substitute by mixing 1/2 cup of milk with 1/2 tablespoon of vinegar or lemon juice and letting it sit for 5 minutes.
Mini Red Velvet Layer Cakes
Created by: Veronica Miles
Recipe Type: Home Baked Bliss
Skill Level: Intermediate
Final Quantity: 12 mini cakes
What You'll Need
For the Mini Cakes
- 1 cup all-purpose flour
- 1/2 cup granulated sugar
- 1/4 cup unsweetened cocoa powder
- 1/2 teaspoon baking soda
- 1/4 teaspoon salt
- 1/2 cup vegetable oil
- 1/2 cup buttermilk, room temperature
- 1 large egg, room temperature
- 2 tablespoons red food coloring
- 1 teaspoon vanilla extract
- 1 teaspoon white vinegar
For the Cream Cheese Frosting
- 8 ounces cream cheese, softened
- 1/2 cup unsalted butter, softened
- 2 cups powdered sugar
- 1 teaspoon vanilla extract
- 1-2 tablespoons milk (optional for consistency)
How-To Steps
Preheat your oven to 350°F (175°C). Grease and flour a mini cake pan or line it with parchment paper.
In a bowl, whisk together flour, sugar, cocoa powder, baking soda, and salt until well combined.
In another bowl, mix together vegetable oil, buttermilk, egg, red food coloring, vanilla extract, and vinegar until smooth.
Gradually add the dry ingredients to the wet ingredients, stirring gently until just combined.
Pour the batter into the prepared mini cake pan. Bake for 20-25 minutes, or until a toothpick inserted into the center comes out clean.
Allow the cakes to cool in the pan for 10 minutes, then transfer them to a wire rack to cool completely.
While cakes cool, beat together cream cheese and butter until smooth. Gradually add powdered sugar and vanilla extract. If needed, add milk for desired consistency.
Once cooled, slice the mini cakes in half horizontally. Frost the top of one layer, stack another on top, and repeat until all layers are stacked. Frost the top and sides of the stacked cake.
Decorate as desired and serve these irresistible mini cakes to your guests!
Extra Tips
- Make sure to use fresh ingredients for the best flavor. Don't skip the vinegar, as it helps react with the baking soda to create a lighter cake texture.
Nutritional Breakdown (Per Serving)
- Calories: 380 kcal
- Total Fat: 26g
- Saturated Fat: 15g
- Cholesterol: 195mg
- Sodium: 85mg
- Total Carbohydrates: 32g
- Dietary Fiber: 3g
- Sugars: 24g
- Protein: 6g